Tionesta Trikes is almost done restoring this little fellow. Aquired in October of 2005, this pint-sized trike had almost all of it's OEM parts still in tact. This project will be a 100% restore from the frame up. Tionesta Trikes will restore this trike to it's "Original Condition". No Mods on this little guy - we want it to be "Show-Room" when finished.
All I need to do is finish up some small things on the 1975 ATC90K3. The seat needs to be recovered, and the wiring needs "worked" on. I had to scab some wires together to get it running. I will be purchasing a NOS carb and still need to spit shine some of the chrome parts. I did have this old trike for a ride already though.
Feels pretty good to ride an ATC the same age as you are!
-
VITAL STATS
-
89cc
-
4 Speed Automatic Transmission with hi-lo Range (8 forward gears)
-
Chain Drive
-
Oil Capacity = 1.0 Qt
-
Fuel Capacity = 1.9 Gal. (including Res.)
-
Start Method - Recoil Pull
-
Over 6,000 Feet Elevation Quick Change Carb
-
Weight - EST 228Lbs
-
MSRP New Approx- $581.00
- 89cc
- 4 Speed Automatic Transmission with hi-lo Range (8 forward gears)
- Chain Drive
- Oil Capacity = 1.0 Qt
- Fuel Capacity = 1.9 Gal. (including Res.)
- Start Method - Recoil Pull
- Over 6,000 Feet Elevation Quick Change Carb
- Weight - EST 228Lbs
- MSRP New Approx- $581.00
TIONESTA TRIKES RESTORATION IN PROGRESS
October 17, 2005
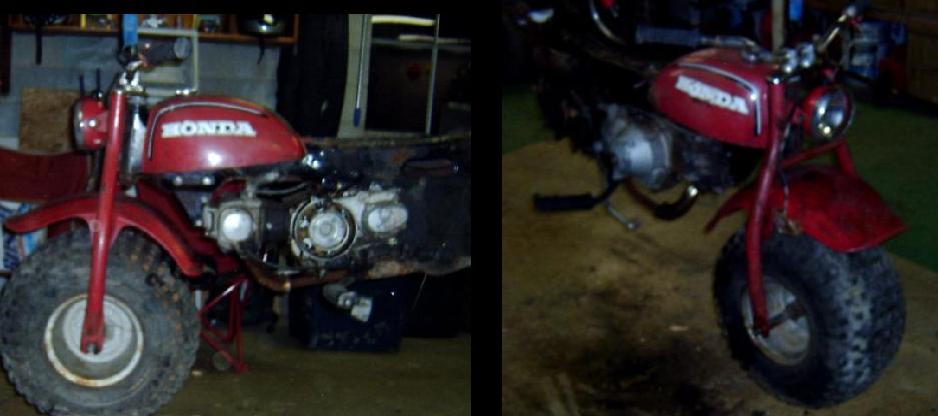
The 1975 Honda ATC90 Arrives at Tionesta Trikes.
October 18, 2005
Rear tires and hubs removed. Chain guards and chain removed. Rear brake assembly and axle removed. Air box removed.
WD-40 bath to all exposed bolts and nuts. Here it is, hanging from the rafters in the Tionesta Trikes Shop.
Estimated time: 1 hour
October 19, 2005
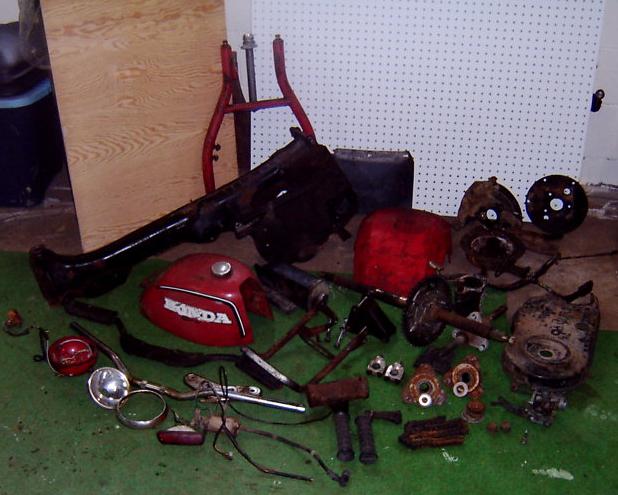
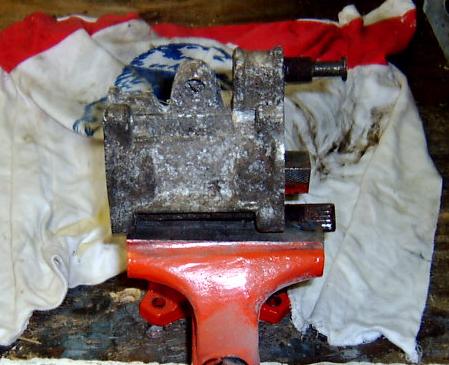
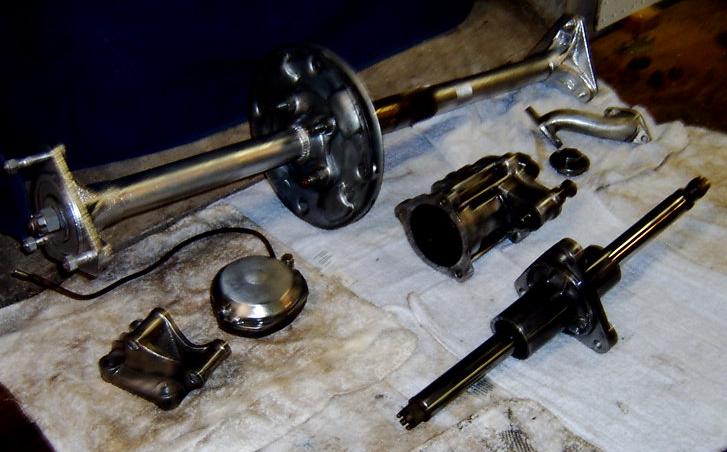
Finished tear down. After yesterday's WD-40 Bath, every nut and bolt came out with ease. No broken bolts. As you can see,
it is completely ripped down to nothing. I can now begin cleaning, sandblasting, and preping for paint.
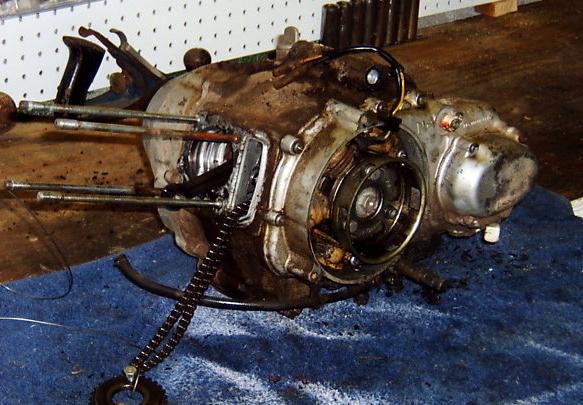
I also tore the jug off of the engine. WOW - there was so much carbon build up in there that I can't believe it ever ran.
I will take the head and piston to Chip's Cycle Works to have him look it over and tell me if I need anything new, like piston,
rings, and so on. Personally at this point, I think it will need rings, at least, and maybe a valve job. The points look
to be in pretty good shape. All and all, not bad to this point, being as though this is a 30 year old ATC.
Estimated time: 4 hours

November 13, 2005
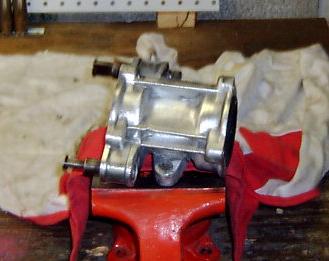
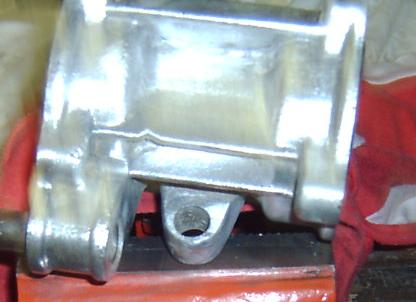
Today I had a little helper in my shop. Shelly helped me clean and prep and paint some parts. We cleaned the rear
bearing carrier with a wire wheel drill attachment and a screw driver (for the nooks and crannys) then clear coated it.
We also did the same process to the rear hubs, the rear axle assembly, the intake manifold, the points cover, and the valve
cover/head motor mount. We also did the front axle assembly. Some of the parts we just shined up and clear coated, while
some of the really rusty parts, such as the rear hubs, we cleaned and painted. Below you can see the progress of today's
work. Estimated time: 4 hours
January 12, 2006
It has been a while since I have done anything to the 90 - mainly because of the low tempratures and lack of heat in my garage.
My Dad recently donated his old Kerosene furnace to me, so now that I have it hooked up, I can work in my garage at a comfortable
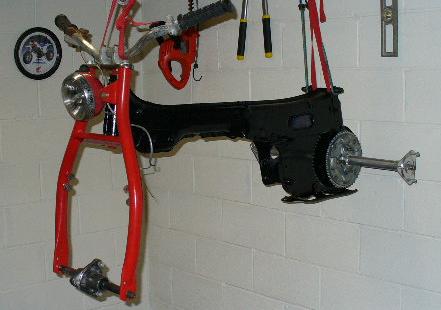
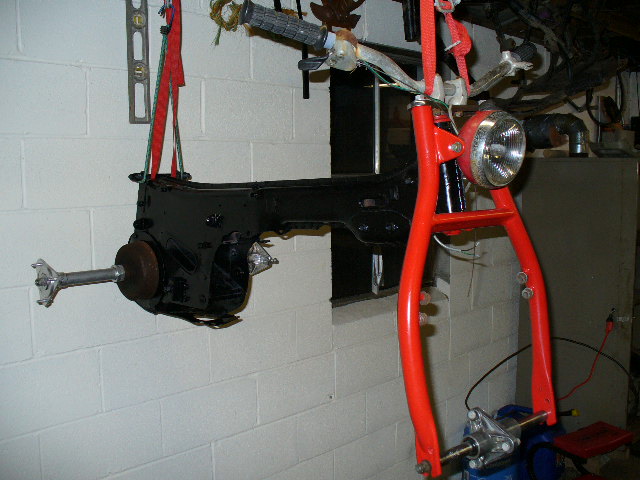
60 degrees F. Today, I installed the bearing carrier into the frame, installed the rear axle, and re-assembled the front
forks and triple. This makes it look like a 3 wheeler again. More pics to come soon!
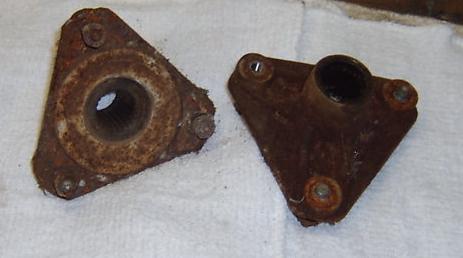
January 16, 2006
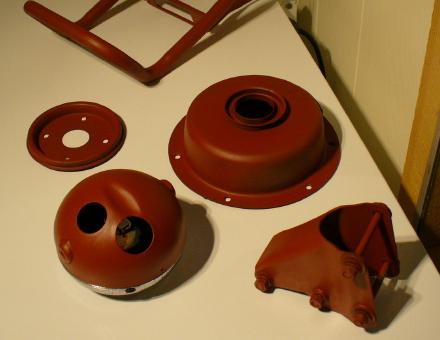
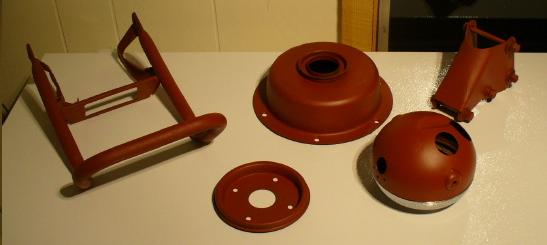
More Sandblasting----Tonight Shelly helped me sandblast some parts - let me re-phrase - tonight, Shelly sandblasted some
more parts for me. She did a great job. She sanblasted my rear grab bar, then my brake drum cover, and the axle
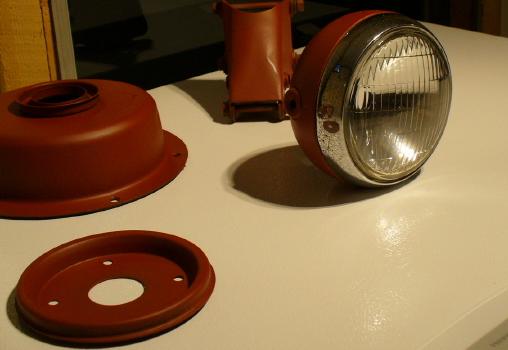
cover, and the sprocket shroud, then finally the front motor mount. I disassembled the headlight and sandblasted it. I
also polished the chrome beauty ring that goes around the headlight. It was somewhat pitted, but came out looking pretty good.
I have decided at this point, not to re-chrome the original chrome parts such as the triple tree top, the grab bar, due to
the high cost of chrome plating. I would have about $100 into each part. I will go with a chrome spray paint for now. Maybe
down the road someday, I can get them re-chromed, or just get a nice set off of e-Bay or something, but for now, chrome
spray paint will have to do.
I then primed all of the parts that were sandblasted, except for the rear sprocket guard, as it is currently soaking
in parts cleaner, to get the inside cleaned up. It was really gunked up with old chain lube and muck. Here are some
pictures of the parts we sandblasted and primed.

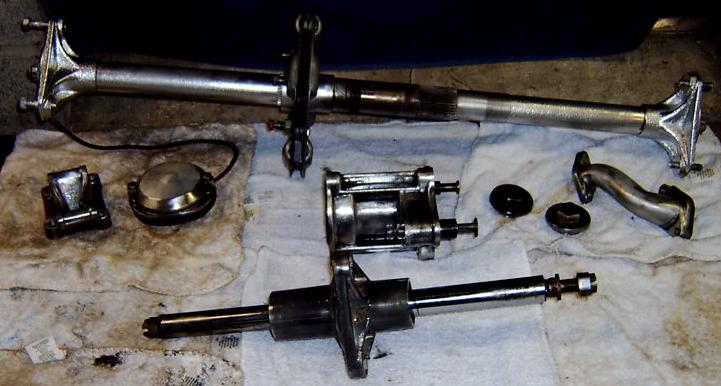
February 10, 2006
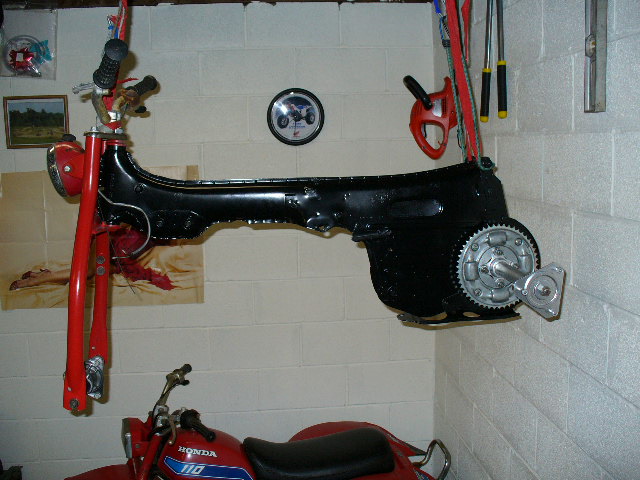
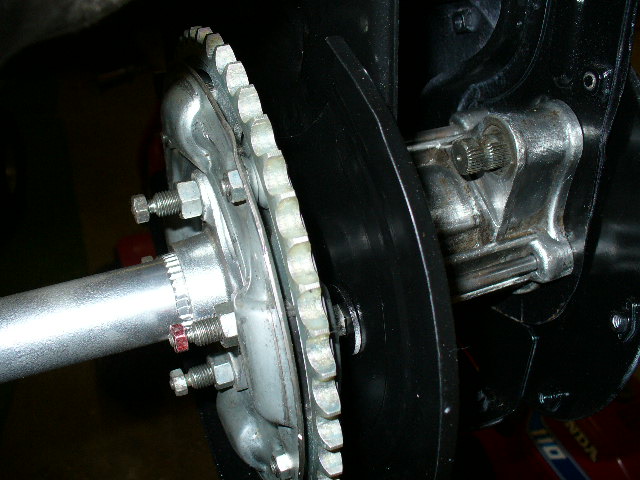
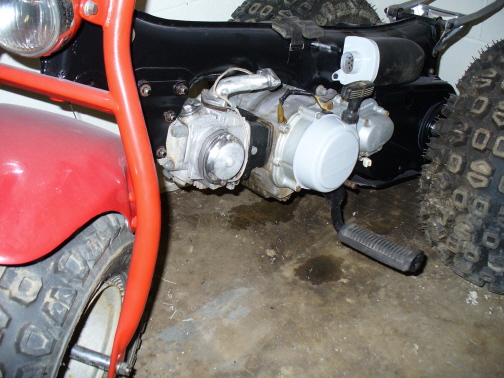
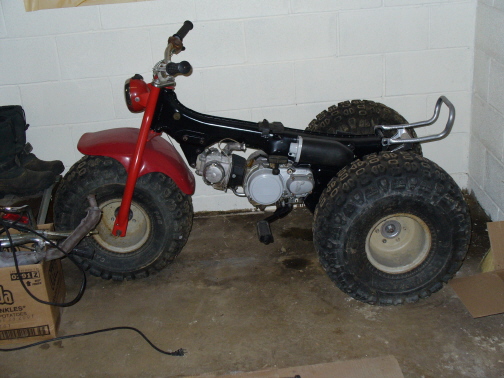
I have gotten alot done in the past month on this little gem. I have pretty much assembled it back together. I came across a running
1978 model that will be the engine doner, and this engine will be spare parts for now. I have this thing pretty much
in check right now.
Here are some pics - cheers!
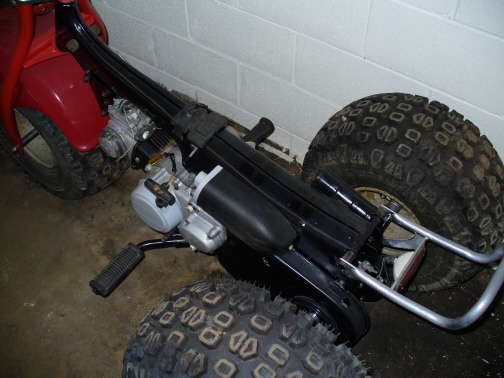
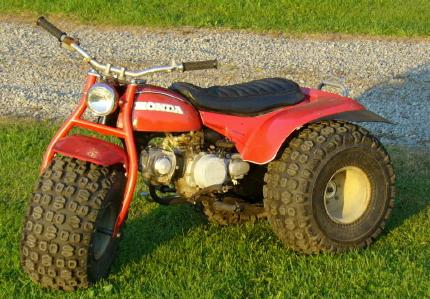
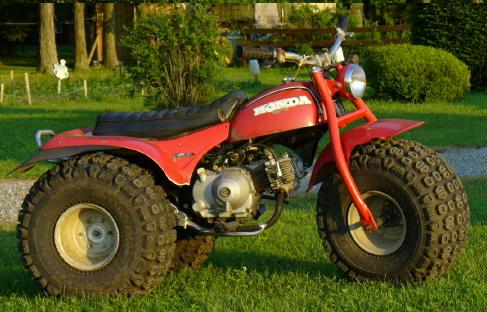
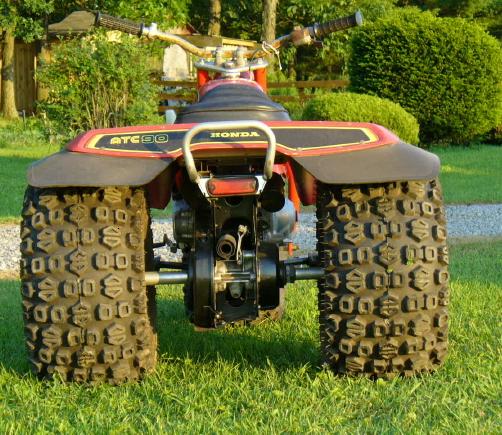
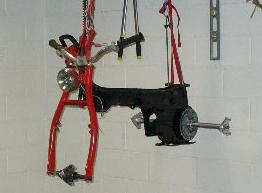
Together - FINALLY!!!!
October 17, 2005
The 1975 Honda ATC90 Arrives at Tionesta Trikes.
October 18, 2005
Rear tires and hubs removed. Chain guards and chain removed. Rear brake assembly and axle removed. Air box removed. WD-40 bath to all exposed bolts and nuts. Here it is, hanging from the rafters in the Tionesta Trikes Shop. Estimated time: 1 hour
October 19, 2005
Finished tear down. After yesterday's WD-40 Bath, every nut and bolt came out with ease. No broken bolts. As you can see, it is completely ripped down to nothing. I can now begin cleaning, sandblasting, and preping for paint. I also tore the jug off of the engine. WOW - there was so much carbon build up in there that I can't believe it ever ran. I will take the head and piston to Chip's Cycle Works to have him look it over and tell me if I need anything new, like piston, rings, and so on. Personally at this point, I think it will need rings, at least, and maybe a valve job. The points look to be in pretty good shape. All and all, not bad to this point, being as though this is a 30 year old ATC. Estimated time: 4 hoursNovember 13, 2005
Today I had a little helper in my shop. Shelly helped me clean and prep and paint some parts. We cleaned the rear bearing carrier with a wire wheel drill attachment and a screw driver (for the nooks and crannys) then clear coated it. We also did the same process to the rear hubs, the rear axle assembly, the intake manifold, the points cover, and the valve cover/head motor mount. We also did the front axle assembly. Some of the parts we just shined up and clear coated, while some of the really rusty parts, such as the rear hubs, we cleaned and painted. Below you can see the progress of today's work. Estimated time: 4 hoursJanuary 12, 2006
It has been a while since I have done anything to the 90 - mainly because of the low tempratures and lack of heat in my garage. My Dad recently donated his old Kerosene furnace to me, so now that I have it hooked up, I can work in my garage at a comfortable 60 degrees F. Today, I installed the bearing carrier into the frame, installed the rear axle, and re-assembled the front forks and triple. This makes it look like a 3 wheeler again. More pics to come soon!January 16, 2006
More Sandblasting----Tonight Shelly helped me sandblast some parts - let me re-phrase - tonight, Shelly sandblasted some more parts for me. She did a great job. She sanblasted my rear grab bar, then my brake drum cover, and the axle cover, and the sprocket shroud, then finally the front motor mount. I disassembled the headlight and sandblasted it. I also polished the chrome beauty ring that goes around the headlight. It was somewhat pitted, but came out looking pretty good. I have decided at this point, not to re-chrome the original chrome parts such as the triple tree top, the grab bar, due to the high cost of chrome plating. I would have about $100 into each part. I will go with a chrome spray paint for now. Maybe down the road someday, I can get them re-chromed, or just get a nice set off of e-Bay or something, but for now, chrome spray paint will have to do.I then primed all of the parts that were sandblasted, except for the rear sprocket guard, as it is currently soaking in parts cleaner, to get the inside cleaned up. It was really gunked up with old chain lube and muck. Here are some pictures of the parts we sandblasted and primed.
February 10, 2006
I have gotten alot done in the past month on this little gem. I have pretty much assembled it back together. I came across a running 1978 model that will be the engine doner, and this engine will be spare parts for now. I have this thing pretty much in check right now. Here are some pics - cheers!
Together - FINALLY!!!!